Changing the IP address is increasingly becoming familiar in the context where connecting to the Internet is becoming indispensable in everyday life. However, a significant number of users are still unclear about the concept of IP address as well as how to change it on mobile devices and personal computers. To help everyone understand more about this issue, let’s delve into learning about IP and the specific steps to effectively and safely change the IP address.
Why Change the IP Address?
The Internet Protocol (IP) address, a special series of numbers used to identify devices on the Internet, is often used whenever we connect to the network. However, in some cases, changing (or “faking”) the IP address can bring significant benefits.
Protection of Personal Safety and Data
When you connect to the network, your IP address becomes accessible. This opens up the possibility for malicious individuals to access and steal your personal information or important data. Changing your IP address regularly can help prevent this, protecting your data and privacy from potential risks.
Overcoming Geographical Restrictions
There are applications and web services only available to users in certain countries. Changing your IP address to another country will help you access these applications and services without trouble.
Avoid Being Banned
Some countries have policies banning access to certain applications or websites. By changing your IP address to a country without restrictions, you can continue to access your favorite services and applications without limitations.
Improving Network Speed
The network can become overloaded when too many users access it at the same time, reducing internet speed. Changing the IP can help you avoid this overload, providing a faster and smoother browsing experience.
Resolving IP Address Conflicts
In a network environment, multiple devices using the same IP address can cause conflicts, disrupting your browsing experience. Changing the IP address not only helps resolve this issue but also improves the overall speed and performance of your web browsing.
Guide to Changing IP Address for Android Phones
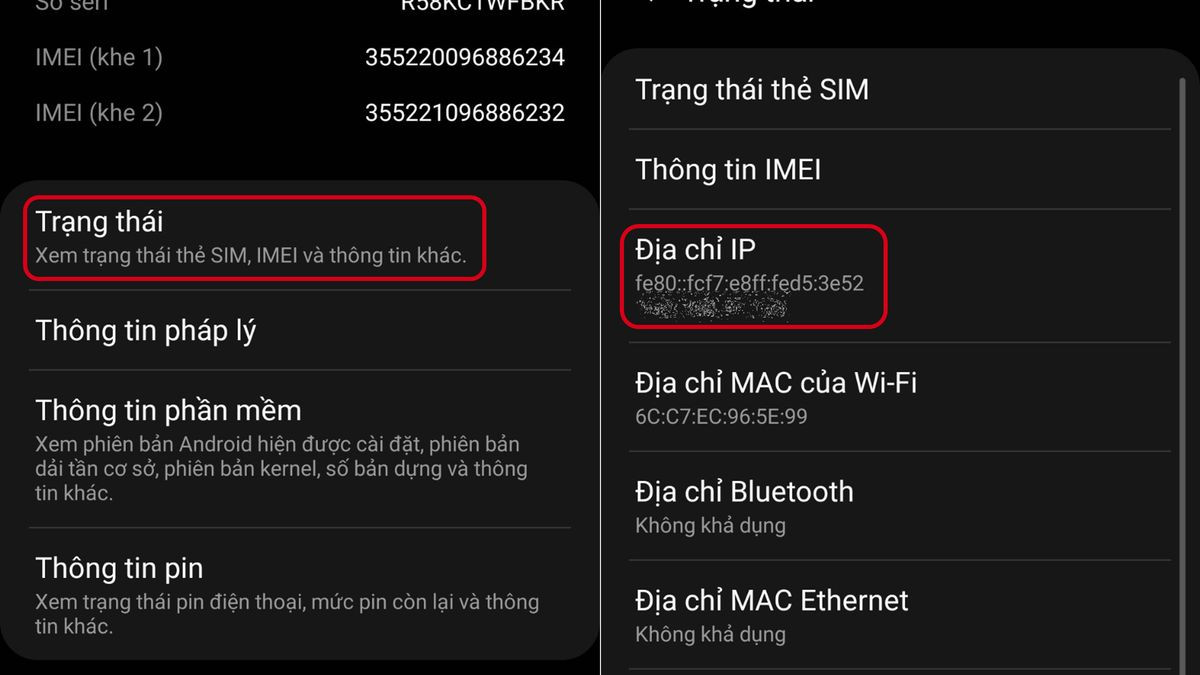
In the digital age, changing the IP address on Android phones has become a common task. Below is a secret to help you perform this task smoothly and accurately.
Step 1: Access the Settings
First and most importantly, open Settings on your Android phone. This step is a prerequisite for the following tasks.
Step 2: Approach Network & Internet
Next, access the Network & Internet section and continue to select the Wifi section. You are moving closer to changing the IP.
Step 3: Choose the Connected Internet Network
Touch the name of the Internet network that your device is connected to. A gear icon will appear, select it and then select the Change Network command.
Step 4: Change IP Settings
In the advanced options section, you need to set the IP settings to static mode, instead of automatic (DHCP) which is usually set by default.
Step 5: Enter the New IP Address
Finally, enter the new IP address you want to set up for your device in the IP Address section.
Guide to Changing IP Address for iOS Phones
Frequent iPhone users may feel the need to change their IP address for various reasons. Below is a detailed guide from experts so you can do this easily and effectively.
Step 1: Access the Settings App
Start by opening the “Settings” app on the main screen of your iPhone.
Step 2: Approach the Wifi Section
Next, select the “Wifi” section to access the list of Wi-Fi networks that your device is connected to or can connect to.
Step 3: Choose the Information Icon
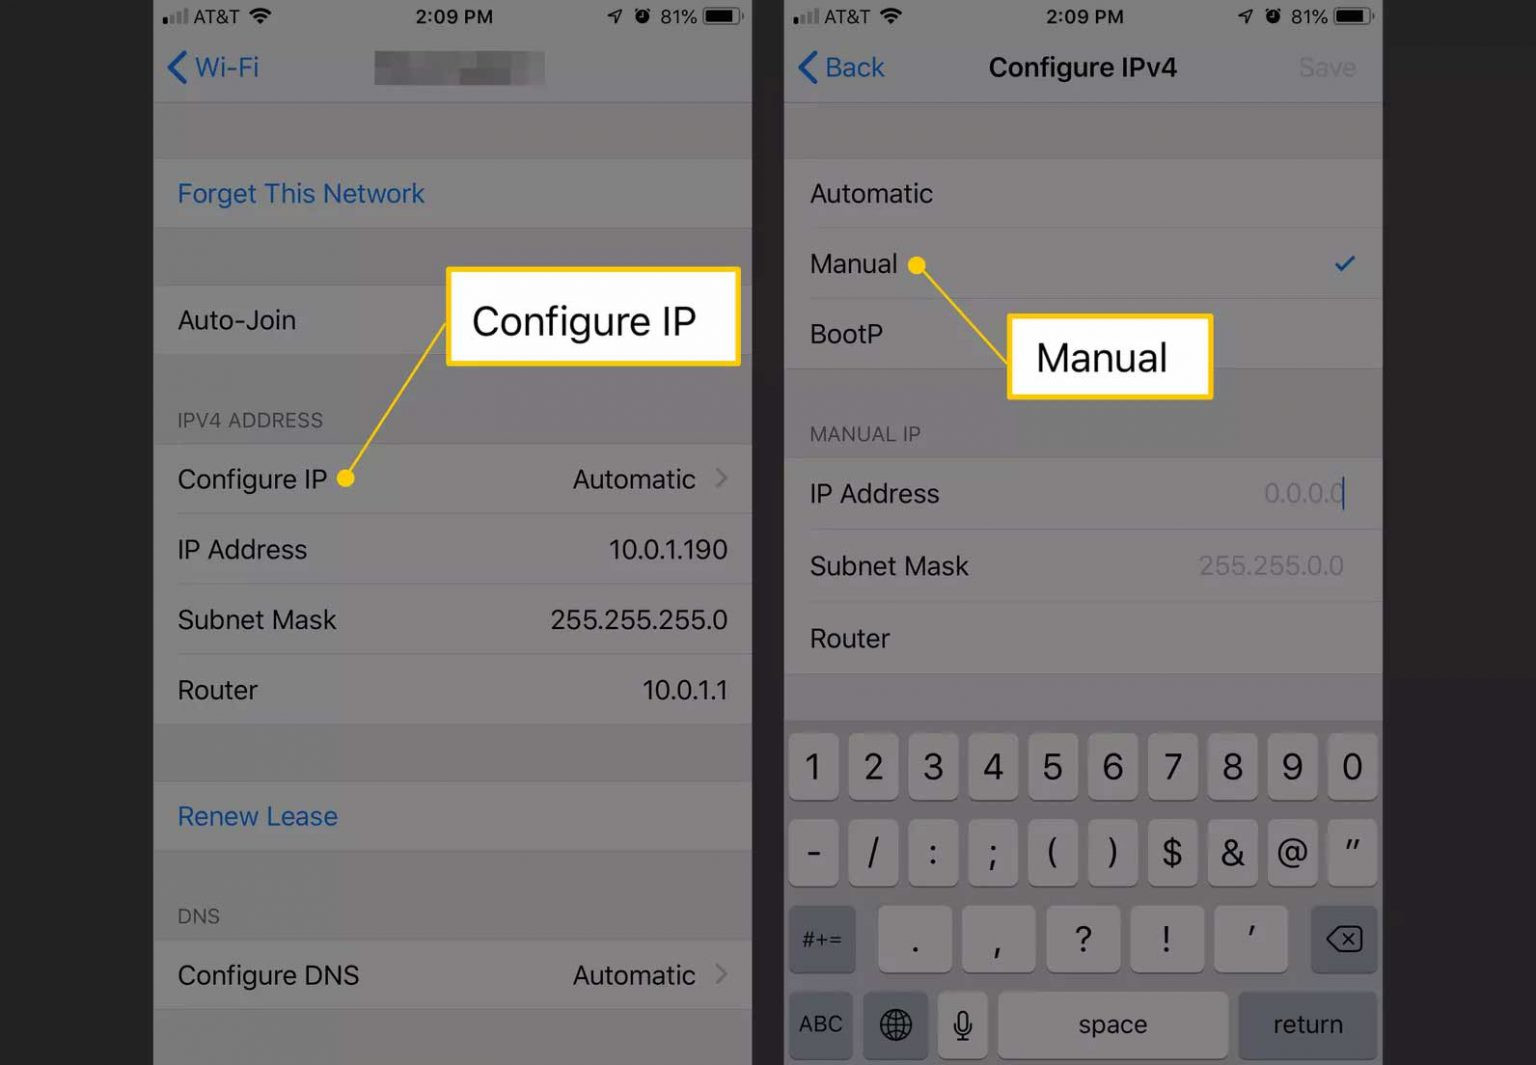
Next, select the information icon (i) located to the right of the Wi-Fi network name you are connected to.
Step 4: Proceed to Manually Set IP
Then, select “Configure IP” and then press “Manual” to proceed to set the IP as desired.
Step 5: Enter Detailed Network Information
Finally, you just need to complete the network information, including “IP Address” and “Domain System” as required.
Guide to Changing IP Address for Computers
Microsoft’s Windows 10 operating system is one of the most advanced versions, providing users with a series of advanced features and utilities. For those who want to change the IP address on their computer, below is a detailed and accurate guide.
Step 1: Access the Network Settings Menu
Start by right-clicking on the Wifi icon in the lower-right corner of the screen, then select “Network & Internet settings” from the displayed menu.
Step 2: Go to Change Adapter Options
Next, press the name of the displayed Wifi or Ethernet connection on the screen, then select “Change adapter options” to open the Network Connections window.
Step 3: Access Properties
In the Network Connections window, right-click on the network connection (Ethernet or Wifi) you want to change the IP of, then select “Properties”.
Step 4: Edit Internet Protocol
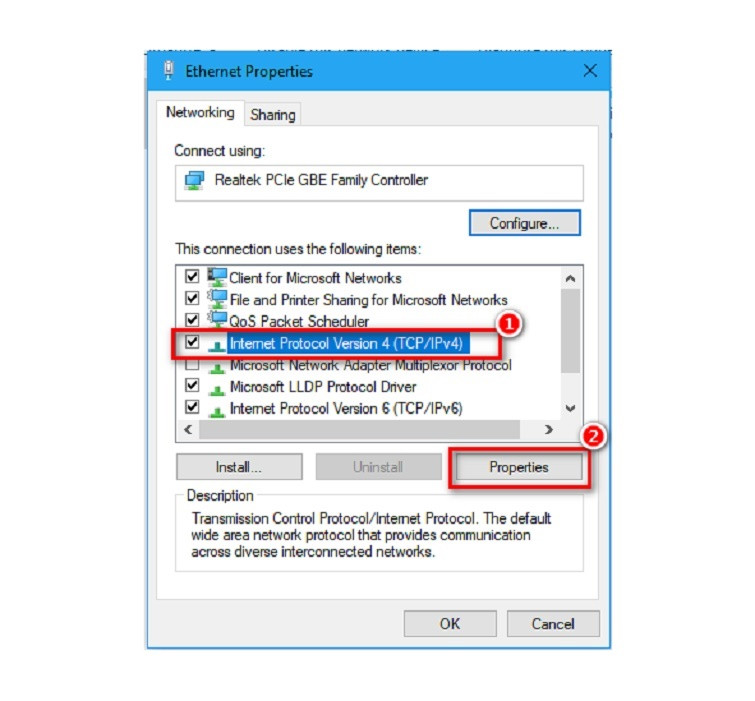
A new dialog box appears, select “Internet Protocol Version 4 (TCP/IPv4)”, then press the “Properties” button.
Step 5: Change IP Settings
Here, the computer automatically selects the dynamic IP address mode. If you want to set a fixed IP address, select “Use the following IP address” and enter the desired IP address along with other information such as Subnet mask and Default gateway.
Purchase Affordable Proxy at proxyv4.net
Explore the Internet safely and effectively with the excellent proxy service from Proxyv4.net! Are you looking for a stable, fast, and secure proxy solution? Come to Proxyv4.net, which offers affordable proxy services without compromising quality. With Proxyv4.net, you can easily access the Internet without worrying about security issues or access limitations. Built on advanced technology and a powerful server system, Proxyv4.net ensures that you will get the best browsing experience, without having to worry about connection speed or stability. Try our service and feel the difference today!


